Replacing a Toilet?
There are many good reasons for replacing a toilet, including:
 Size – the toilet bowl may be too high, too low, too wide or narrow for comfort
- Appearance – you may be remodeling and updating with a new bathroom look
- Damage – replacing a toilet tank or bowl that’s cracked
- Age – this may relate to appearance or water efficiency
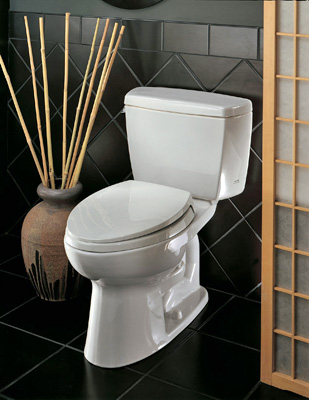
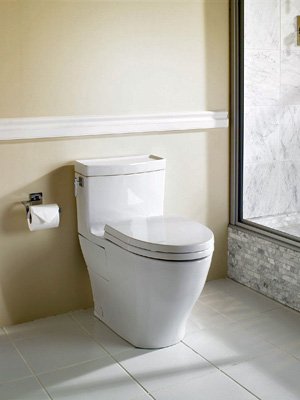
Let’s talk about that last one – age. People are more likely to replace a toilet because of how it looks than how it works. For instance, a former homeowner’s pink toilet may not match your sense of style. Some people replace toilets with open trapways (left) because concealed trapways appear more elegant and are easier to keep clean.
Toilet efficiency is often overlooked, but when you know the effect toilets have on your water bill, saving water may become the best reason for replacing a toilet.
High- Efficiency Toilets Save Water and Money
The water efficiency of a toilet relates directly to its age. US toilets made since Jan. 1, 1994 must use no more than 1.6 gallons of water per flush. Some of the first low-flow toilets were not well designed and produced incomplete flushing. Many older homes still have those toilets, and they are prime candidates for replacement.
Toilets made from the early 1980s through the mid-1990s typically used 2.5 – 3.6 GPF, and toilets made earlier may use as much as 6 – 7 gallons per flush! New designs and technologies enable strong flushing capability while conserving water: today’s high-efficiency toilets use less than 1.3 GPF. You can tell new toilets aren’t water guzzlers when they display the Environmental Protection Agency’s WaterSense label.
Some cities encourage conserving water by offering rebates on qualifying WaterSense products, including toilets. To see if you qualify for this rebate, look for your city on the EPA’s WaterSense rebate finder.
Replacing a Toilet in 8 Steps
Whatever your reason is for replacing a toilet, you can do it yourself or hire a plumber. The job may take an hour or two for an experienced professional; it will probably take you longer, but it’s definitely something you can do. If you decide to hire out the job make certain to use a licensed plumber.
That said, this is not a task for everyone. People with back or leg injuries or who cannot lift heavy and bulky things should steer clear.
With that in mind, let’s look at the steps to replacing a toilet without injuring yourself or causing damage to your home. Here are the tools and supplies you’ll need:
- A wrench set or an adjustable span wrench
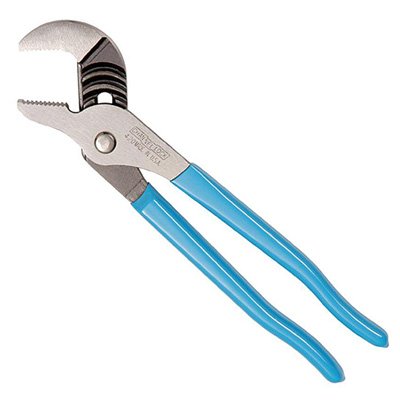
- Channel locks (tongue and groove pliers, shown at right)
- Plunger
- Large, flat-blade screwdriver
- Carpenter’s level
- Putty knife
- A big piece of heavy cardboard (moving boxes are great) or a plastic pan big enough to hold the toilet base
- Bucket or pan to hold water
- Silicon plumber’s grease
- An old towel, a few rags, and a roll of paper towels
- New wax ring
- Caulk or plumber’s putty
1. Turn Off Water Supply at Toilet
 Before you dive into anything else, first turn off the water supply at the valve on the wall behind the toilet. Then flush the toilet and hold the handle down for about 10 seconds to clear most of the water from the tank. Soak up any remaining water with a sponge or towel and wring it out in the bucket.
There will be some water remaining at the bottom of the bowl. Use a plunger to force as much of it down the bowl as you can, and then soak up the rest with the towel or sponge. Any water left in the bowl will end up on your floor when you remove the toilet.
2. Disconnect Water Supply Line from the Tank
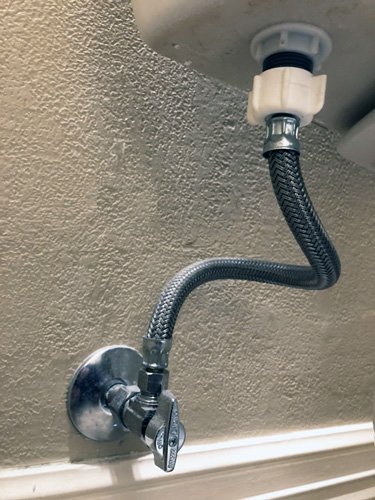
Turn the plastic nut on the water supply line at the bottom of the tank to disconnect it. Have the bucket or pan ready to catch any water that spills from the line. You may be able to turn the nut with your fingers, but if not, use the channel locks, being careful not to damage the nut.
If the water supply line is flex tubing, you shouldn’t need to replace it. If it is older, semi-rigid tubing it should be replaced with flexible metal tubing.
NOTE: the water shutoff valve should be located beneath the pressure fitting on the water supply line. If it is above it, you will need to shut off the main water supply at your emergency shutoff or at the water meter to replace the water supply line to the toilet.
Make sure to prepare a place to place the toilet once it’s removed. Use the big pan or heavy cardboard for this. If using cardboard, cover it with plastic (a big trash bag is fine).
3. Remove the Toilet
 Replacing a toilet begins with removing the old toilet. Caution: it will be heavy. Be sure to lift from the knees during this step to avoid injury to your back.
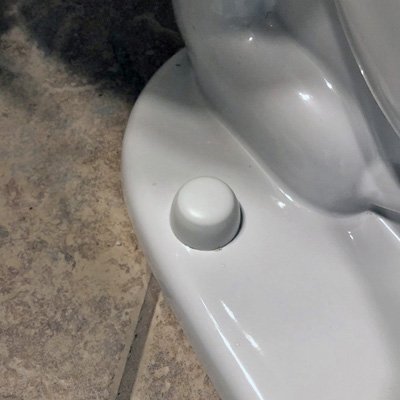
Remove the caps that cover the ends of the closet bolts and then unscrew the nuts and remove them from the bolts. You will need a wrench.
You can now lift the toilet from the floor. You may have to gently rock it side-to-side to loosen the connection with the wax ring seal. You may leave the toilet tank attached or remove it for easier handling. Be careful: If the rubber gaskets beneath the tank bolt heads are corroded, they will leave black stains on anything they touch, making for extra cleaning.
Do not leave the tank lid on when you move the toilet. It can fall onto the floor and break or injure you. Set the toilet on its side or back on your prepared surface, keeping the tank and bowl supported. Lay the toilet on its side and wipe off any remaining wax from the bottom with paper towels.
4. Plug Drain Hole and Remove Old Wax Ring
Stuff a rag loosely into the hole in the floor to prevent sewer gasses and fumes from entering your home. This will also help prevent knocking bolts, nuts, or tools down the drain.
Use the putty knife to scrape the wax ring from the closet flange over the drain line. Wipe the wax on paper towels and put them in the trash. Sometimes you will discover the toilet has been sealed with plumber’s putty instead of wax. If so, it will be harder to remove.
You should not need to replace the closet flange unless it is damaged or improperly installed. It should rise one-eighth to one-quarter of an inch above the floor surface. It should not be cracked, chipped, or badly rusted.
If there is a problem with the flange it must be resolved before moving to the next step. Replacing a toilet flange is a project in its own right, as this video about how to replace a cast-iron toilet flange explains.
5. Check Alignment and Level
 Test-fit the base of your new toilet over the closet flange to make sure that the bolts align with the holes at the base and that the toilet sits level on the floor. Check level from side-to-side and front-to-back. Once you are satisfied with the fit, lift the toilet off the flange and prepare it for the new toilet.
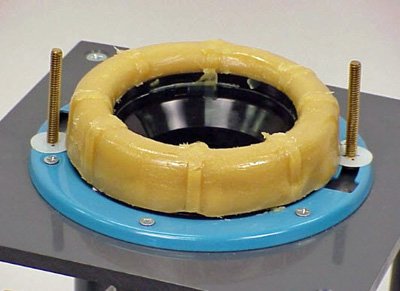
First, replace the old closet bolts with new ones. Then remove the rag from the drain and place a new wax ring on the flange between the bolts. If you prefer, invert the new toilet bowl and press the new wax ring to the bottom.
6. Position New Toilet
 Now, with the front edge of the toilet bowl assembly on the floor, hold the back off the floor and lower the bowl over the upright closet bolts. Gently rock the bowl into position and press down firmly around the rim of the bowl until all bottom edges touch the floor. The wax will fill in the gap between the bowl and the flange. Re-check with the level. If it is not level, you may need to insert a small shim on the low side.
Install the washers and nuts at the base of the bowl while using a level on the seat to make sure the bowl is not tilting when you position the toilet. The plastic covers for the bolt caps go on first, then the metal washers.
Hand-tighten the nuts first, then use a wrench, alternating from side to side, a half turn at a time. Do not over-tighten! This can crack the bowl. Cut off the bolts with a hacksaw if they are too long to allow the caps to cover them. Fill the caps with plumber’s putty to keep them from coming off easily.
An optional step when replacing a toilet bowl is to use plumber’s putty or caulk to seal the base of the toilet to the floor.
7. Install the Tank
 Once the bowl is in place it’s time to install the tank. First, set the new tank on its side. Place the rubber tank gasket, or spud washer, on the bottom of the tank, if it’s not already attached. As a precaution, you can add some silicon plumber’s grease.
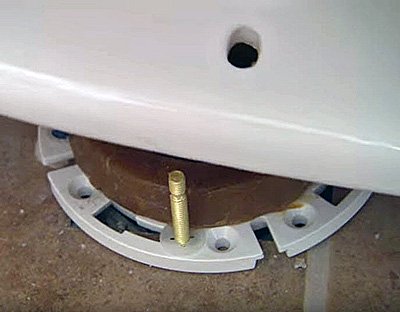
Insert bolts into their designated holes from the inside of the tank after first pushing the rubber washers/gaskets not the bolts, as shown in the cutaway photo here. You may find it easier to put the tank in place and then insert the bolts and washers.
Most kits include metal and rubber washers. The metal ones go between the bolt heads or nuts and rubber washers. Tighten the bolts, making sure not to over-tighten them, using the big screwdriver to hold the bolt in place while you use the wrench to tighten. This short video shows how to attach the tank to the bowl safely.
8. Connect Water Supply
Now, reconnect the water supply line to the water fill valve at the bottom of the tank and hand tighten the plastic nut. Turn on the water supply at the shutoff valve and check for leaks as the tank fills. If water leaks from the valve, tighten the connection a little more. Also, check to see there are no leaks around the tank bolts.
CONCLUSION
Replacing a toilet usually is not complicated. Like most projects, the hardest part is getting started. But, by following these eight steps, you can install or replace a toilet yourself:
- Turn off water supply valve at toilet and flush – sponge out tank and bowl
- Disconnect water supply line from the tank
- Remove the old toilet by removing the bolts and lifting the bowl from the floor
- Plug the drain hole with a rag and remove the wax seal
- Check for alignment
- Position the new toilet
- Install the tank
- Reconnect the water supply and check for leaks
If you have a leg, back, or other health conditions that make it hard to lift heavy things, hire a licensed plumber. Residents of Dallas-Fort Worth, Texas can always call on the skilled plumbers at billyGO for all their toilet installation and repair needs.